Connecting your Azure Web App to a Database using Application Settings
You just built an application that connects with a Database on your local machine, but now you want to share it with the world. But you don’t want to share everything about your application with the world.
Azure web apps supports a number of different web platforms, but to effectively build while maintaining code on GitHub we need to keep configuration details of our app private including the connection string for our database.
In this case we’re going to be using a Node JS application connected to a Mongo Database hosted on a Virtual Machine.
Before we get started… Do you have a MongoDB up and running? Nope. - Read this post! Yep! - Great keep going!
For reference, I’m starting with a chat application originally written by fellow evangelist Rami Sayar for an excellent Node Course he taught recently.
Prereqs: Git Azure Subscription Connection string for a DB in Mongo - mine looks like this: mongodb://40.83.182.555:27017/test
The Steps: 1. Clone or fork the repository 2. Create an App Service 3. Connect App Service to Repository 4. Add app settings in Azure Portal 5. Try it out!
1. Clone or fork the repository
The project I’m using for this demonstration is found here: Github Now clone the project to your local machine, or fork it in GitHub.
Take a quick look at these files: - package.json : checkout out the dependencies of the project, notice how we’re using the official mongodb driver - mongoClientTest.js and dbTest.js : provide other examples/test files to run, just substitute your ip address of where mongo is being hosted to make sure you’re able to connect. - app.js : this is the main file that will be run by Azure Web Apps (app.js or server.js will automatically be started by the cloud when deployed). Also, in app.js you’ll see we set ‘db’ using process.env app.set('db', process.env.DB ); - we’ll be using that in step 4.
Once comfortable with the files locally or in GitHub we’re ready to spin up our App Service in Azure.
2. Create an App Service
App Service is a PaaS service offered by Azure to make deployment of website/web services simple and easy to maintain, develop against, and scale.
To begin select the ‘Plus’ button in the upper left corner and select web+mobile, then select Web App: 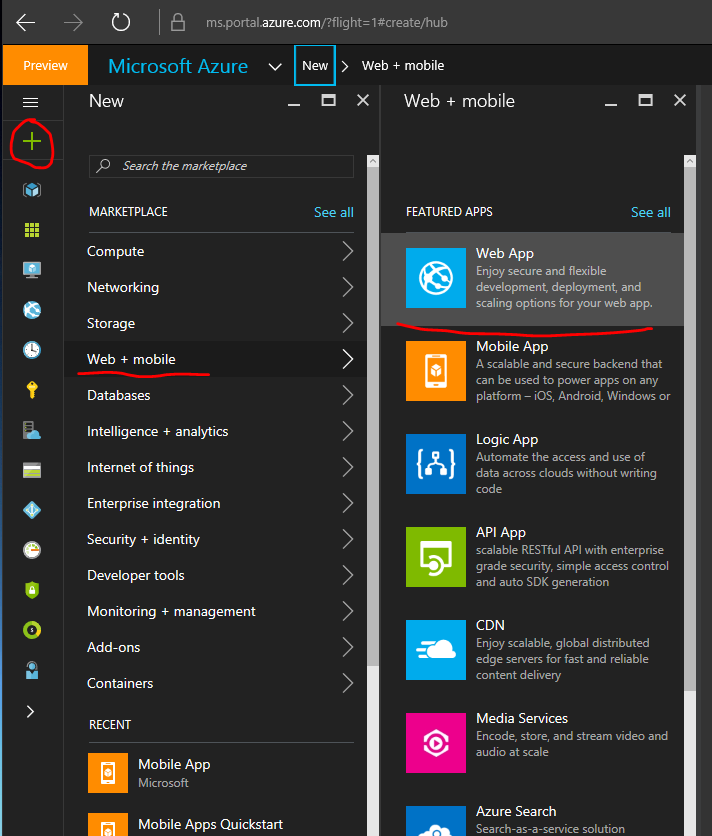
Now configure your web app: 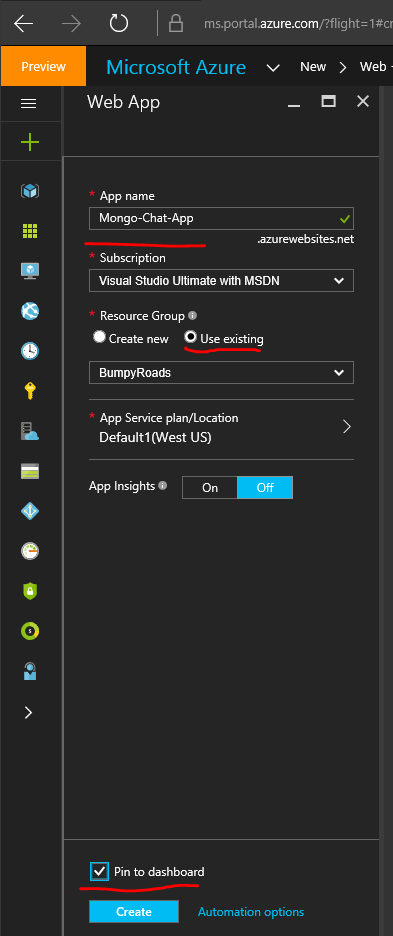
You may have to create a app service plan and resource group if you haven’t created one yet, for more info on this portion of the architecture click here and here
You’ll see this icon on your dashboard while the resource is spinning up: 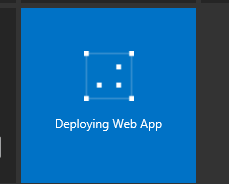
Once running the portal should automatically take you to that resource, if not you’ll see it on your dashboard: 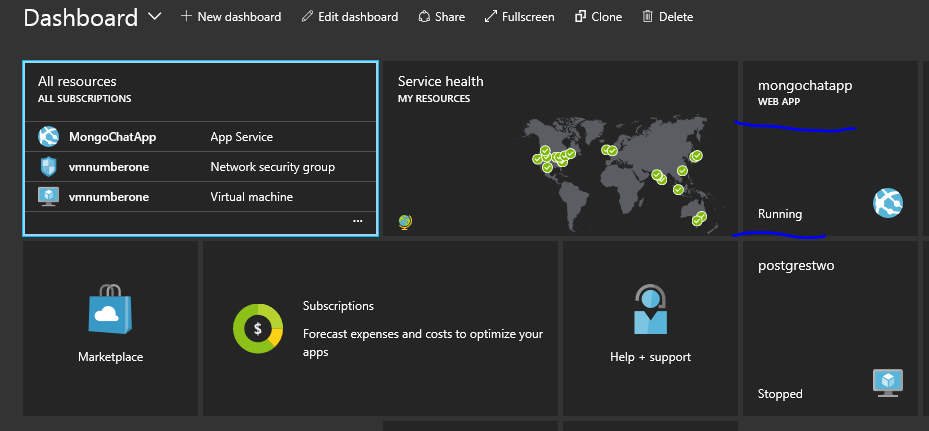
Here’s the overview pane and the items we’ll be using in the rest of this tutorial highlighted: 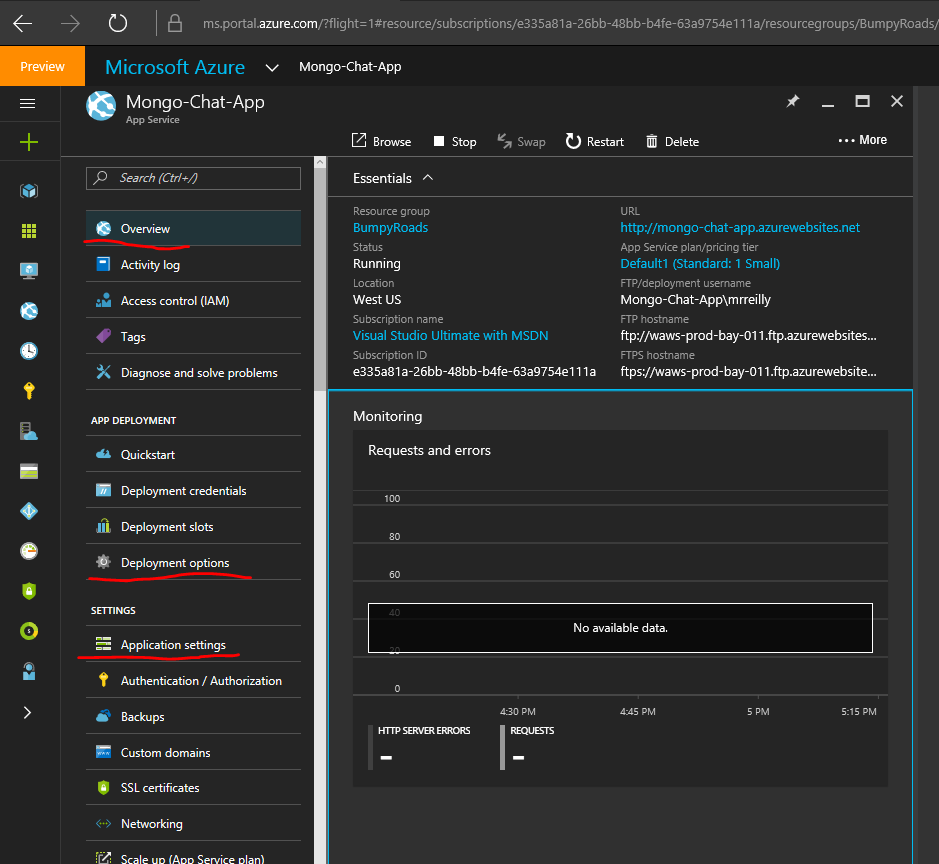
3. Connect App Service to Repository
Now that we have an app service, let’s connect it to our repository. There are a number of options for deployment.
In this case we’re going to deploy from GitHub, but we could have also used a local repository by adding Azure as a remote repo.
Azure will detect changes made to the repository on GitHub and redeploy the project. This makes deployments during hackathons super easy.
Select Deployment options from the overview pane -> Choose Source -> GitHub: 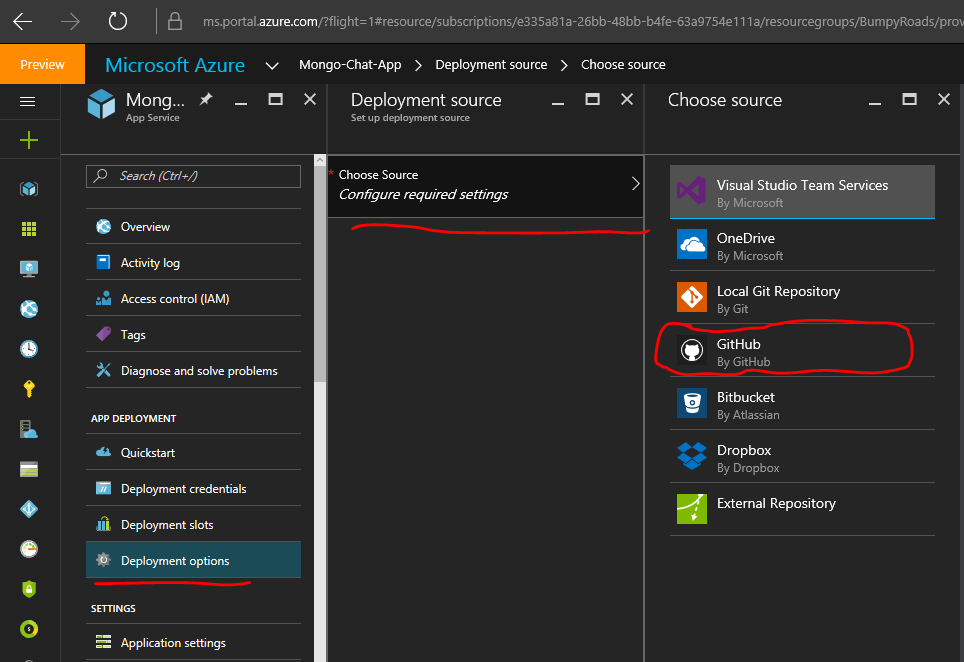
Note: You can also select Local Git Repository if you’ve liked to keep your code off of GitHub and add Azure as a remote repository git add remote azure "http://git.asdfgafdgasdfgasdf" - will be displayed in overview portal once initialized.
You’ll then be asked to login to GitHub so it can access the list of your repos. Select your forked repo or the cloned repo you’ve committed to GitHub: 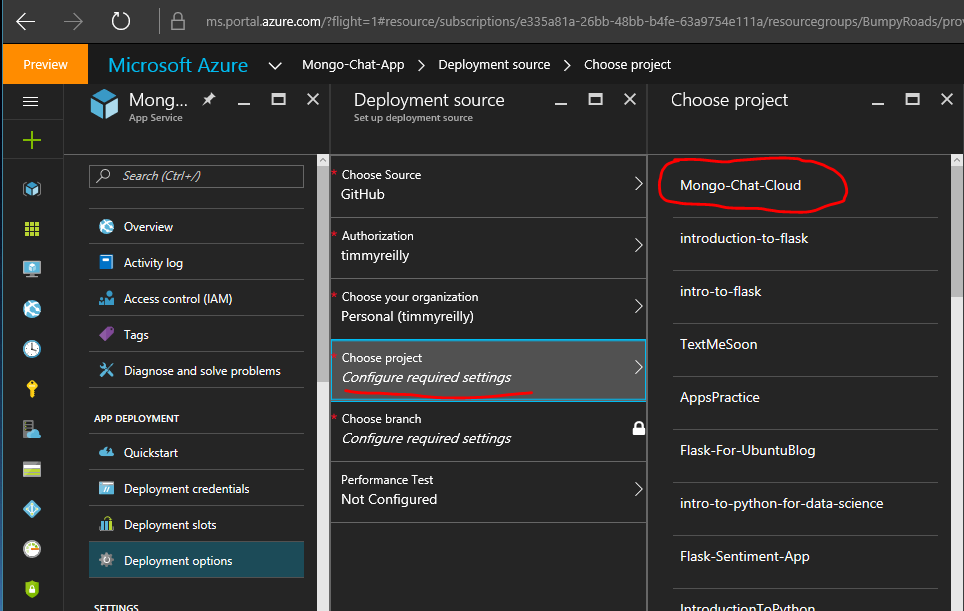
Once selected you’ll see a notification in the top right corner with a loading bar for the deployment: 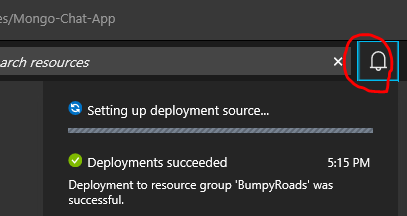
Once that’s finished, you have code ready to roll in the cloud. Azure has automatically installed the packages listed in your package.json and found the file named server.js to deploy. Next let’s configure it to talk to Mongo!
4. Add App Settings in Azure Portal
Now we have a project connected and deployed on Azure, but it won’t store the data anywhere, because a connection string hasn’t been included in the environment variables (aka application settings).
To add our monogodb to the project we just need to include the variable name and the connection string. In our project, as noted before, we set db using process.env.DB
Select application settings and scroll down to until you see app settings then enter into the two empty fields “DB” and the connection string mentioned earlier: mongodb://40.83.182.555:27017/test Like this: 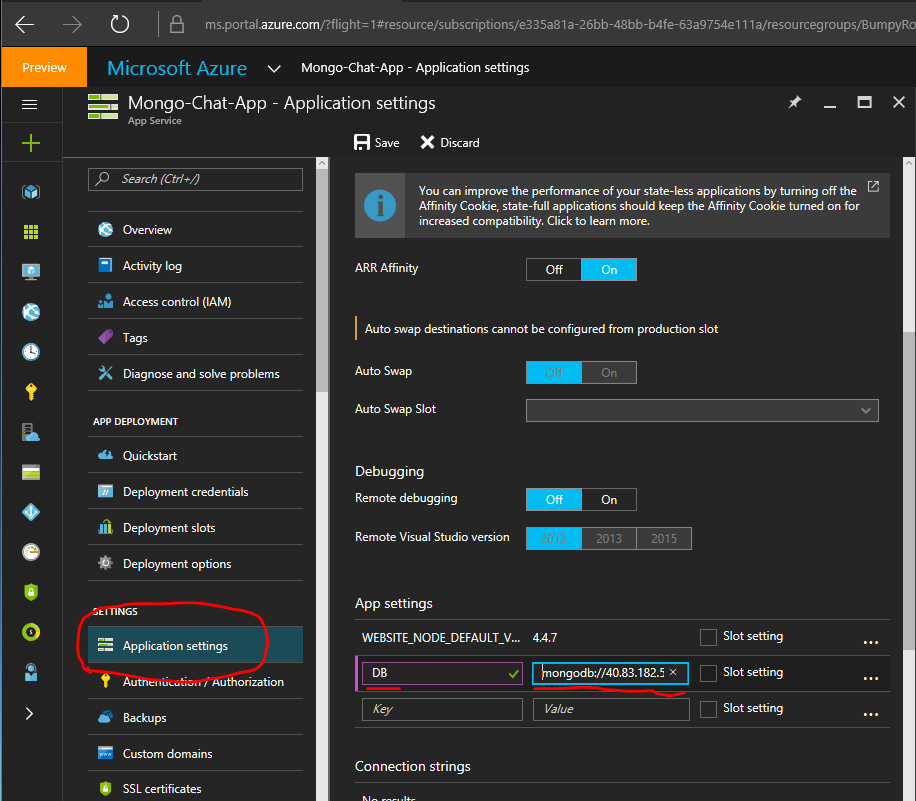
Then hit save!
Go back to your website and try entering some chatter!
Try it out!
If you visited the page it should look something like this: 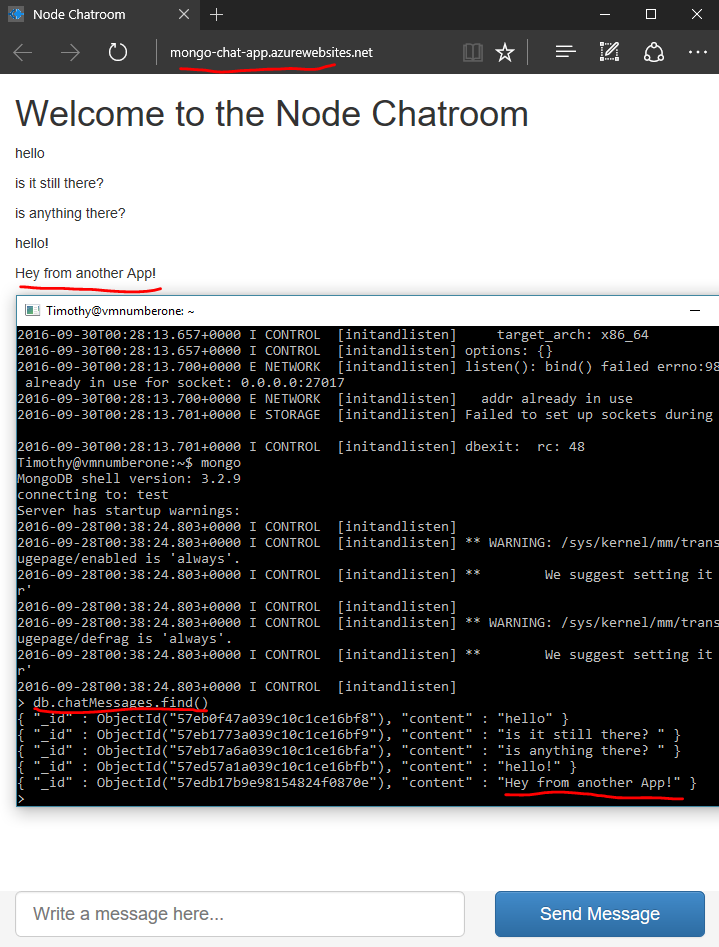
In the middle of the above screen shot you can see a terminal with a connection to the VM and same data in the MongoDB.
If you’re running into issues try connecting using dbTest.js or mongoClientTest.js after you add the specific IP for your VM hosting mongo.
Hope this made it super simple to connect your application to a database using Azure Web Apps. Please let me know if you run into any issues in the comments below.
[caption id=”attachment_9081” align=”aligncenter” width=”660”] When Brett Stateham comes to town…[/caption]