Running Flask on Ubuntu VM
So you have a VM in Azure and want to put it to good use?
Yes. Great!
Before we start make sure you can ssh into your machine and run $sudo apt-get update 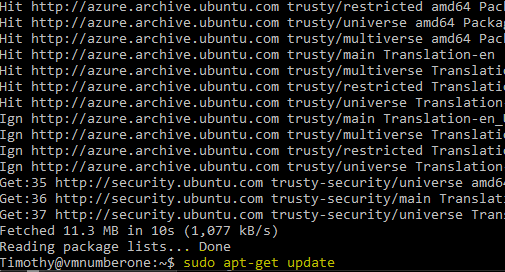
It’s a four step process: 1. Open the appropriate port on Azure 2. Install pip, virtualenv, virtualenvwrapper, and flask 3. Write our code and run it 4. Keep it running with Gunicorn
1. Open the appropriate ports on Azure Go to you virtual machines landing: 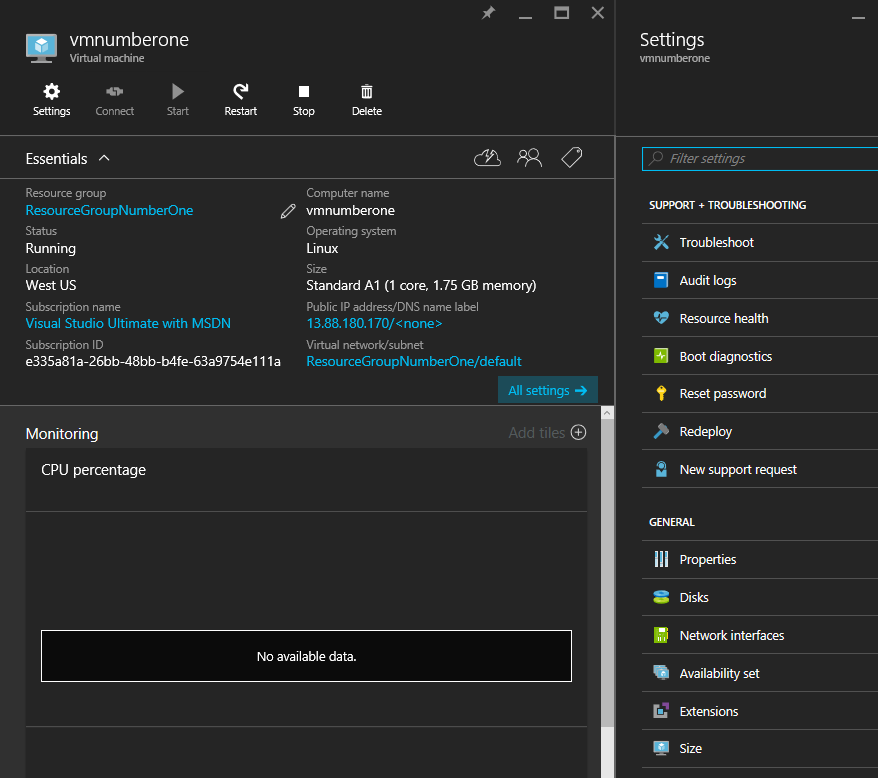
Then select the resource group in the top left corner: 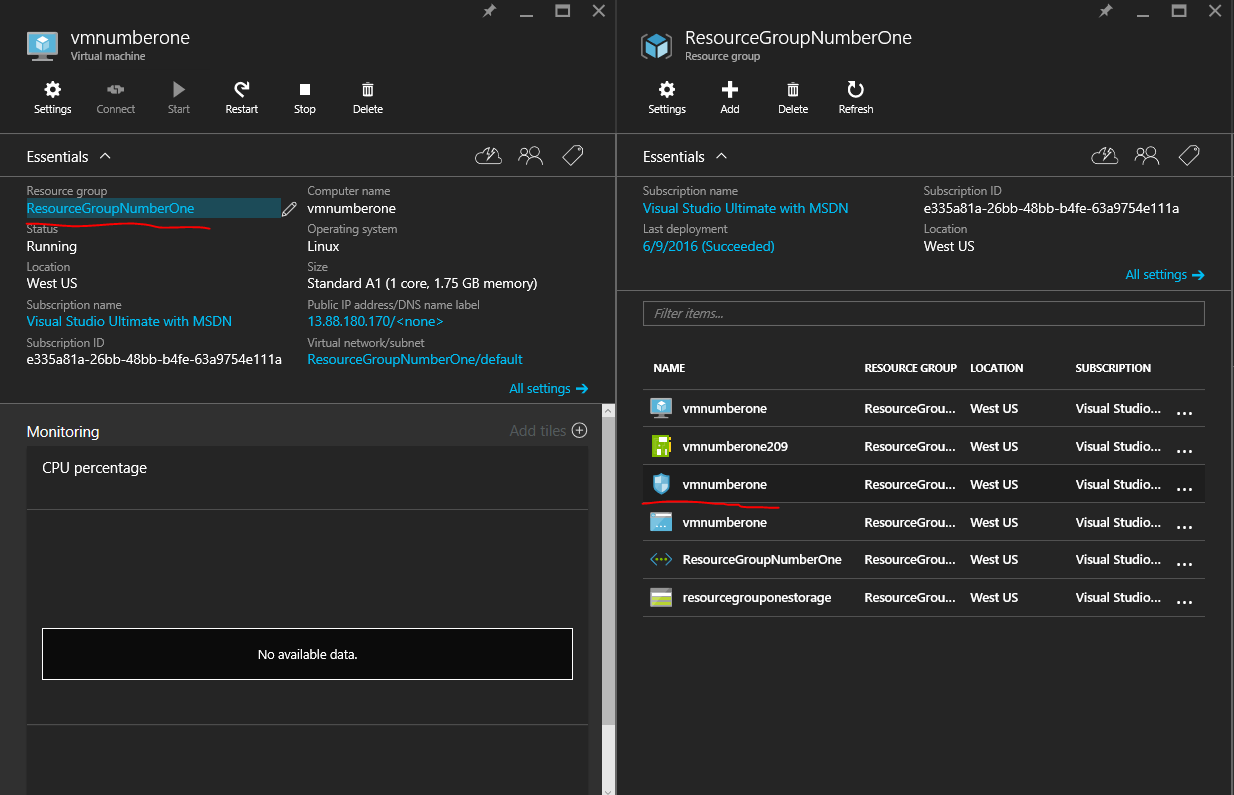
Resource groups are the way Azure breaks down how our VM interacts with the internet, other vms, storage, and public/private networks.
Top open the port we need to change our network security group, which is represented by the shield. (Underlined in the screenshot above)
Then select settings -> Inbound Security Rules: 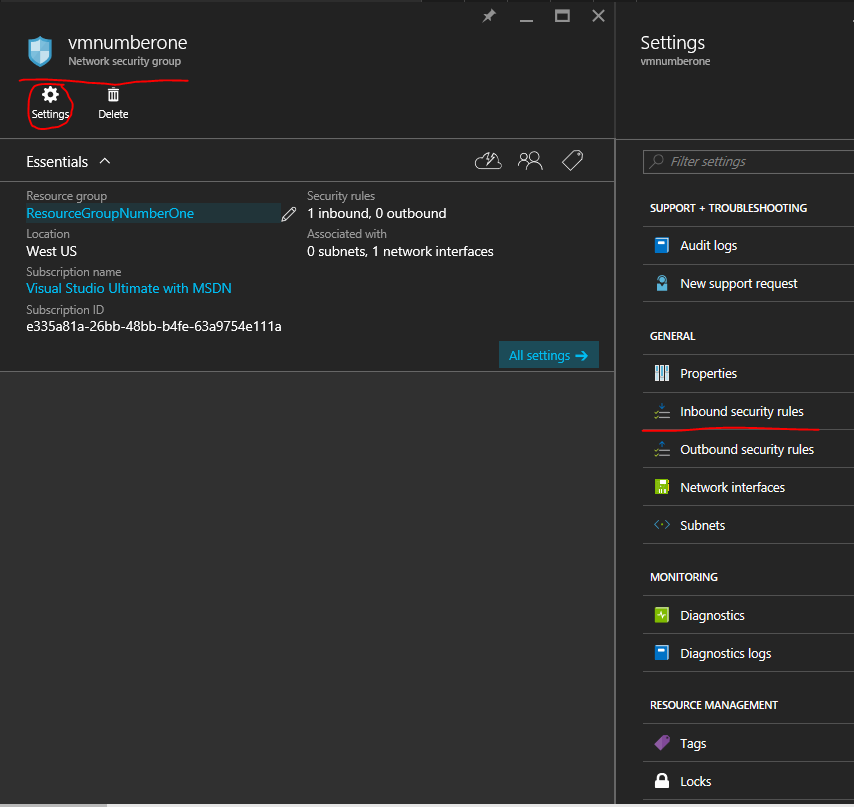
This will allos us to open up our VM to the public internet so we can visit what’s presented at the port like a regular website.
You should see SSH already included, that’s the port we’re using in our ssh client/terminal. 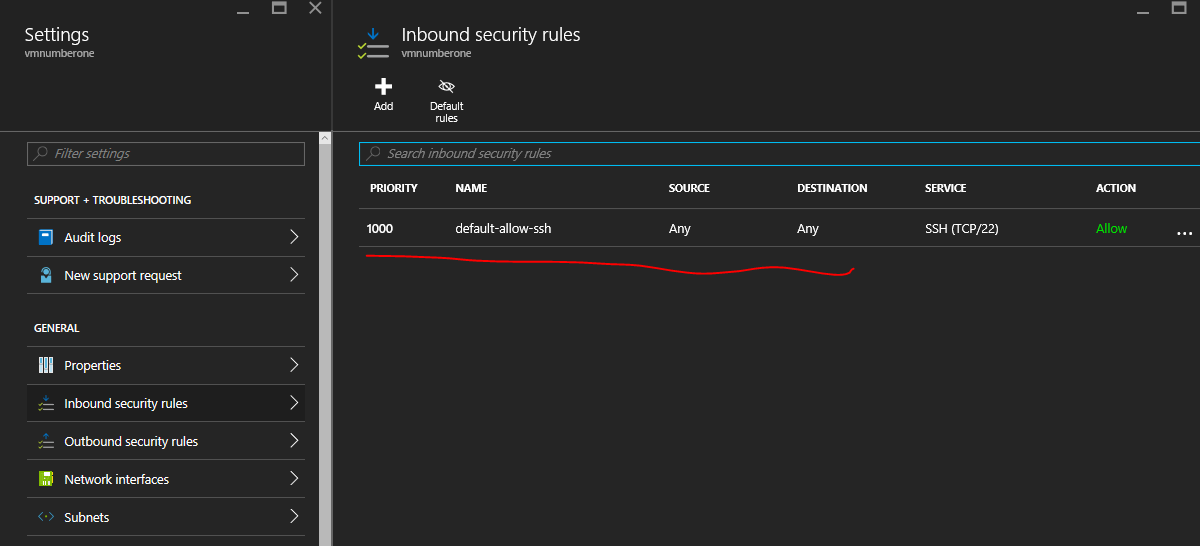
We’re now going to add two new Inbound Security Rules one called FlaskPort where we’ll set the destination port range to 5000 and use for debugging. The second will be called FlaskProduction that we’ll use to deploy our complete app. Here’s the configuration panel for FlaskPort: 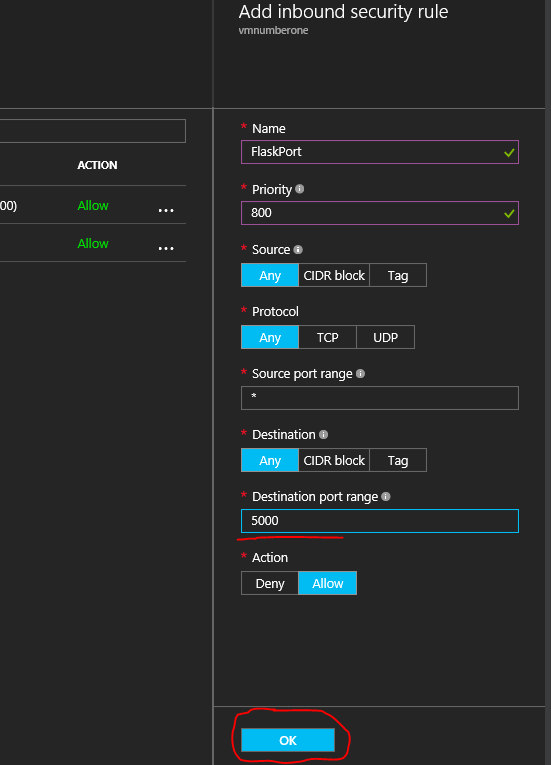 Press okay to accept the settings.
And the other panel for FlaskProduction: 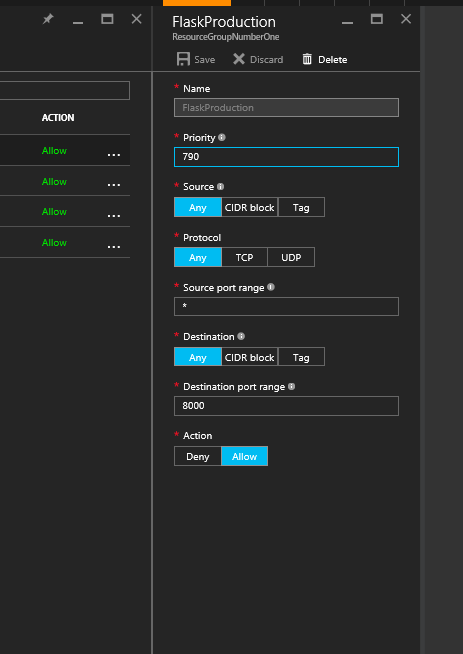 Again press okay to accept the settings.
Notice how the ‘Source Port Range’ is ‘*’ that just means that we’ll accept connections from the port of any machine. This tripped me up the first time.
In a couple seconds the port will be open we’ll be ready to visit it, but nothing will be there because we haven’t create an application server.
To do that we’ll install the basics.
2. Install pip, virtualenv, virtualenvwrapper, and flask
To use Python effectively we utilize virtual environments to help keep our various python project and required libraries in order.
If you get lost in these steps or want more context Gerhard Burger provides the same setup on a very helpful post on askubuntu.
First we install pip: $ sudo apt-get install python-pip
Second we install virtualenv and virtualenvwrapper
$ sudo pip install virtualenv $ sudo pip install virtualenvwrapper
Third we configure virtualenv and virtualenvwrapper
Create a WORKON_HOME string which will contain the directory for our virtual environments. We’ll name it vitualenvs
$ export WORKON_HOME=~/.virtualenvs
Now we’ll create this directory.
$ mkdir $WORKON_HOME
And add this to our bashrc file so this variable is defined automatically every time we hit the terminal.
$ echo "export WORKON_HOME=$WORKON_HOME" >> ~/.bashrc
Then we’ll setup virtualenvwrapper by importing its functions with bashrc.
$ echo "source /usr/local/bin/virtualenvwrapper.sh" >> ~/.bashrc
You can see the additions to our bashrc file by opening it with nano. Scrolling down to the bottom you should see two lines like this: 
Then implement your changes.
$ source ~/.bashrc
Here’s what all that looks like all together: 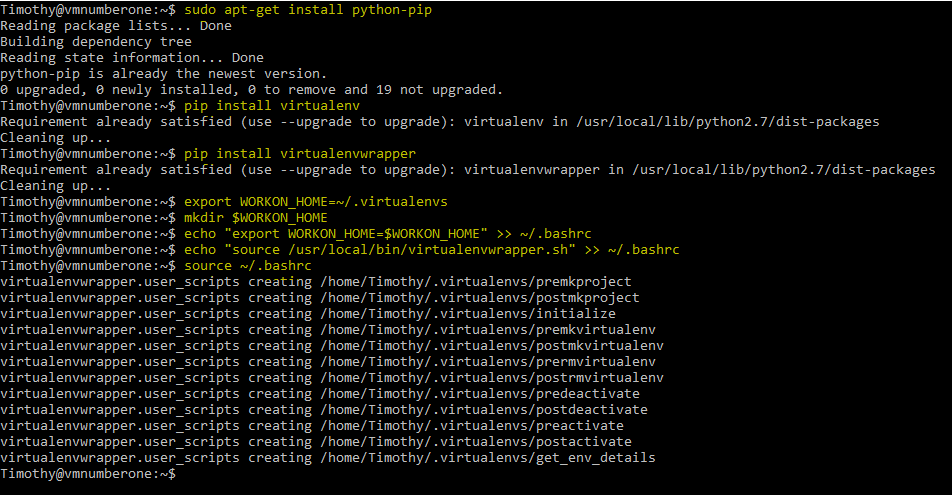
Fourth, let’s create our first virtualenvironment
$ mkvirtualenv venv
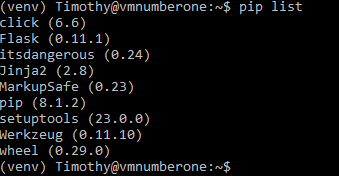
And take a look at the currently installed packages $ pip list
Like so: 
Now we can install all of the python packages we want without risk of needing to reinstall python!
Fifth, install flask:
$ pip install flask $ pip list 
 3. Write our code and run it! Our first app is a simple site that shares an image.
We’re going to create a folder called Photo-App that contains two folders and an app.py that will serve our clients.
To change to our home directory: $ cd ~ And create our new folder: $ mkdir Photo-App
Then create a static and templates folder inside of our app. $ sudo mkdir templtes $ sudo mkdir static  Then create our app.py which will be our python flask server code.
 $ sudo nano app.py Here’s the code:
from flask import Flask, render\_template app = Flask(\_\_name\_\_)

@app.route("/") def index(): return render\_template("index.html")

if \_\_name\_\_ == "\_\_main\_\_": app.run(host='0.0.0.0', debug=True)
And what it looks like in nano: 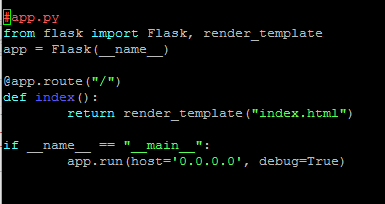
Then we need to add our first template: $ sudo nano templates/index.html
<h1>Wazzup Dog</h1> <img style="max-width:100%;" src="{{ url_for('static', filename='photo.jpg') }}">
And what it looks like in nano: 
Now for our photo we’re going to download an image into our static file using curl. $ cd static $ curl 'http://timmyreilly.azurewebsites.net/wp-content/uploads/2015/12/Snapchat-1802119159214415224.jpg' -o 'photo.jpg'
Cool! We have an app!
To run it simply enter: $ python app.py
Visit from a browser!
Type in the IP address of your virtualmachine with a colon at the end followed by the port. Mine looks like: http://138.91.154.193:5000/
And this is what I see! 
Neato! But when we close the terminal we lose the application… Hmmmm let’s fix that!
4. Keep it running with Gunicorn Real Python provided the bulk of this portion so if you get lost or checkout their site, plus they have info about setting up continuous deployment!
First, we install dependencies $ sudo apt-get install -y nginx gunicorn
Now that our app is ready, let’s configure nginx.
If you’d like to learn more about this Open Source HTTP Server Software checkout their website.
Second, we start nginx. $ sudo /etc/init.d/nginx start
And begin configuration for our project We’re naming our nginx configuration the same as the parent directly of our app.py file in this test case. Here are the commands: $ sudo rm /etc/nginx/sites-enabled/default $ sudo touch /etc/nginx/sites-available/Photo-App $ sudo ln -s /etc/nginx/sites-available/Photo-App /etc/nginx/sites-enabled/Photo-App
Now we add the config settings for our app.
$ sudo nano /etc/nginx/sites-enabled/Photo-App  Here’s the raw text:
 server { location / { proxy_pass http://localhost:8000; proxy_set_header Host $host; proxy_set_header X-Real-IP $remote_addr; } location /static { alias /Photo-App/static/; } }
Then restart the server.
$ sudo /etc/init.d/nginx restart
And navigate to your Python PhotoApp project, and start it using Gunicorn: $sudo gunicorn app:app -b 0.0.0.0:8000 --reload
You’re using gunicorn to start app hosted at 0.0.0.0:8000 with the reload tag configured. The reload will look for changes in your code and reload the server everytime you change any server side stuff. It won’t auto-reload for HTML changes, but will reload them once you make a change to the python code.
Now try navigating to: http://138.91.154.193:8000/ or whatever your IP address is.
You can now close you’re ssh terminal and it will continue to run.
To stop it we have to kill the actual thread it’s running on. $ pkill gunicorn
Like I said at the beginning of this step this was adapted from the realpython.org and they have some awesome next steps available for git deployment + automating the whole process.
The code for the app can be found on GitHub here: https://github.com/timmyreilly/Flask-For-UbuntuBlog
Happy Hacking!
[caption id=”attachment_8631” align=”aligncenter” width=”3024”] This was a nice reminder in the busy airport.[/caption]