Running Node and Express on Ubuntu VM
So you just spun up your first Ubuntu Virtual Machine? No… Let’s fix that: “Intro to Ubuntu on Azure”
YEAH! Let’s put it to work!
The Basic Steps to using node on an Azure VM: 1. Open the Port 2. Install Git and Install Updates 3. Install Node and NVM 4. Code and Install Express 5. Run it and check it out! 6. Use forever to keep it alive
1. Open the Port We’re not talking battleships or submarines we’re talking Infrastructure as a Service. Visit the landing page for your Ubuntu Virtual Machine: 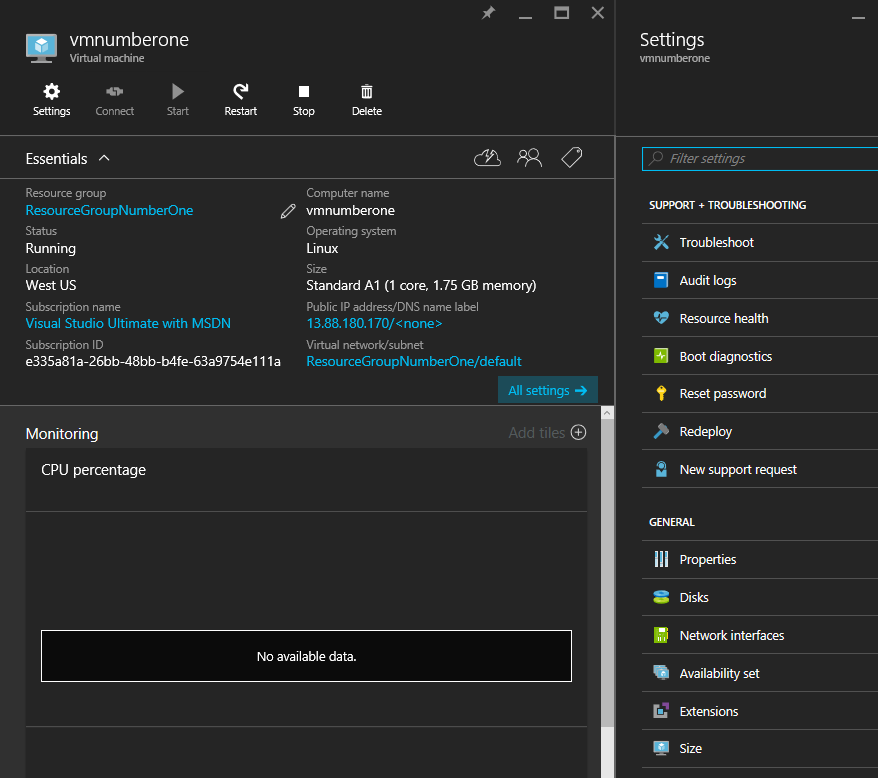
And select the resource group in the top left corner: 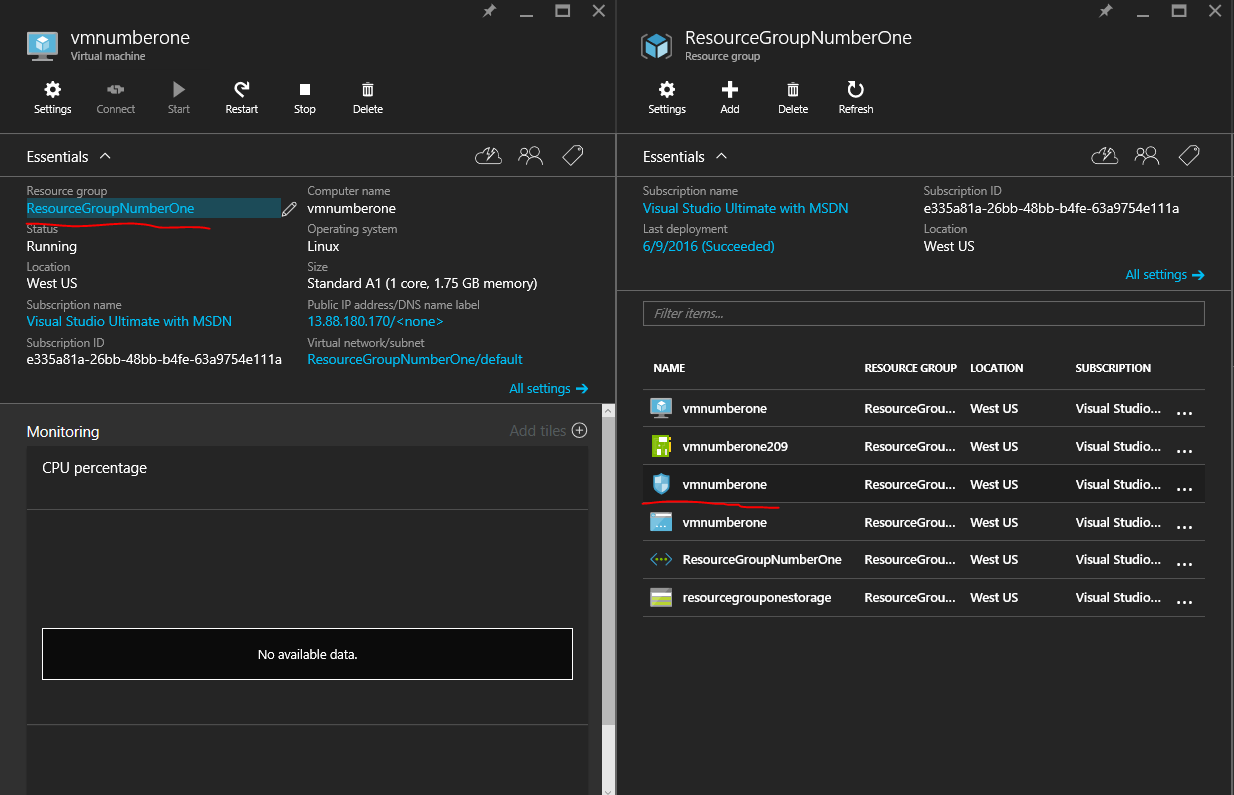
Resource groups are the way we break down how our VM interacts with the internet, other vms, storage, and public/private networks.
To open the port we need to change our network security group which is represented by the shield. (Underlined in the above screenshot) Then we’ll select settings -> Inbound security rules 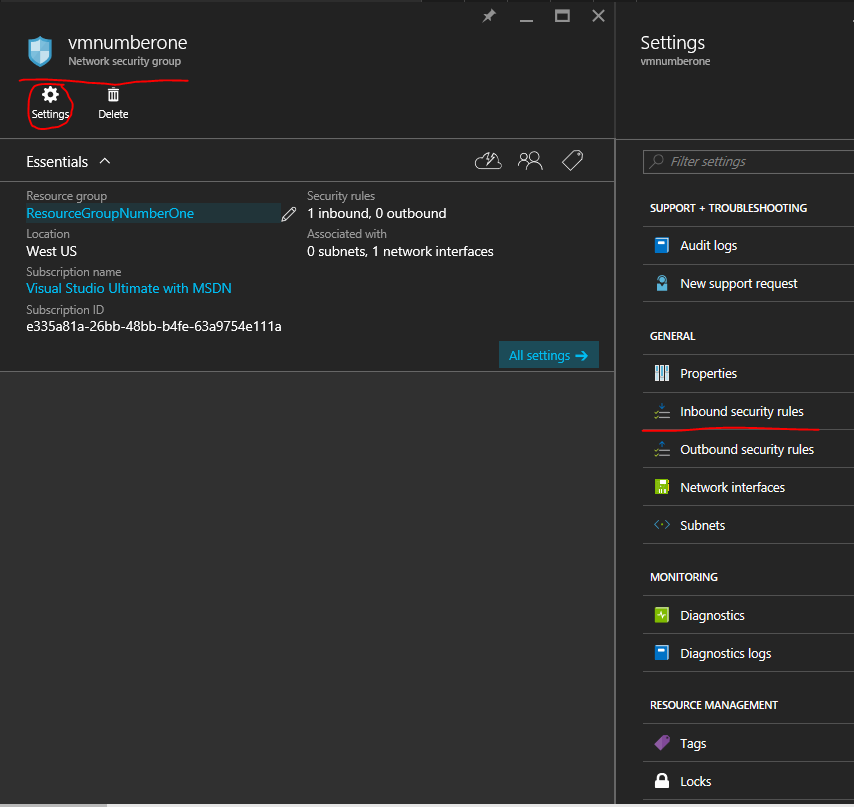
This will allow us to open up our VM to the Public Internet so we can visit it like any other website.
Under ‘Inbound security rules’ SSH is already included: 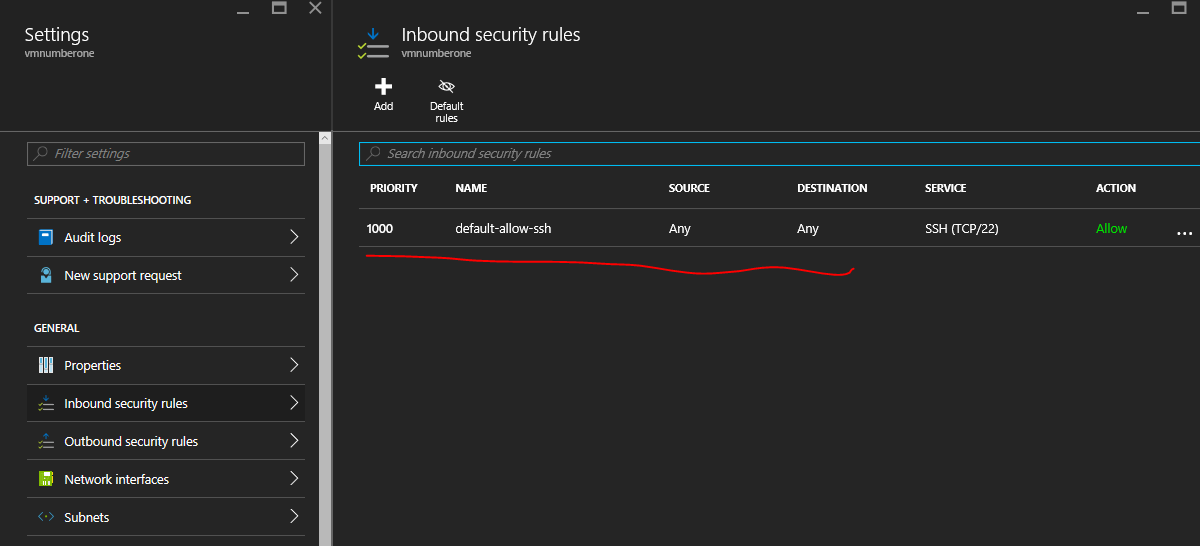
We’re going to add a new Inbound security rule named ExpressServerPort where we’ll set the Destination port range to 3000 which we’ll see later when starting our server. Here’s the configuration pane for our ExpressServerPort: 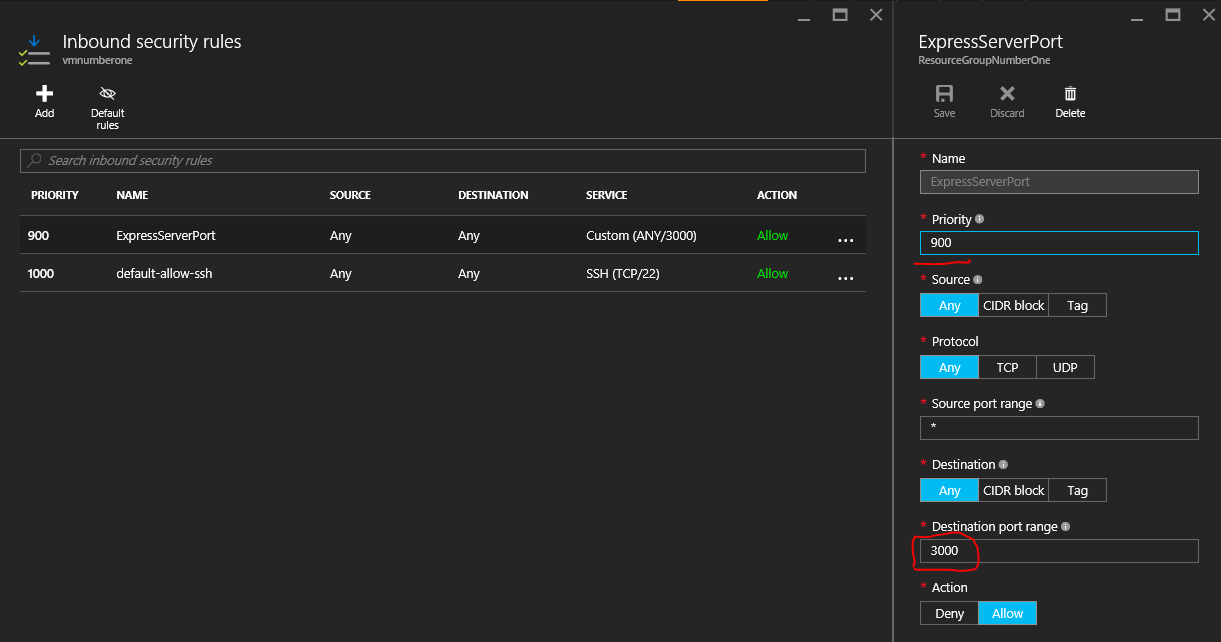
2. Install Git and Check Updates Git is fun!
SSH into our Virtual Machine like we did in the VM intro then enter: $ sudo apt-get install git 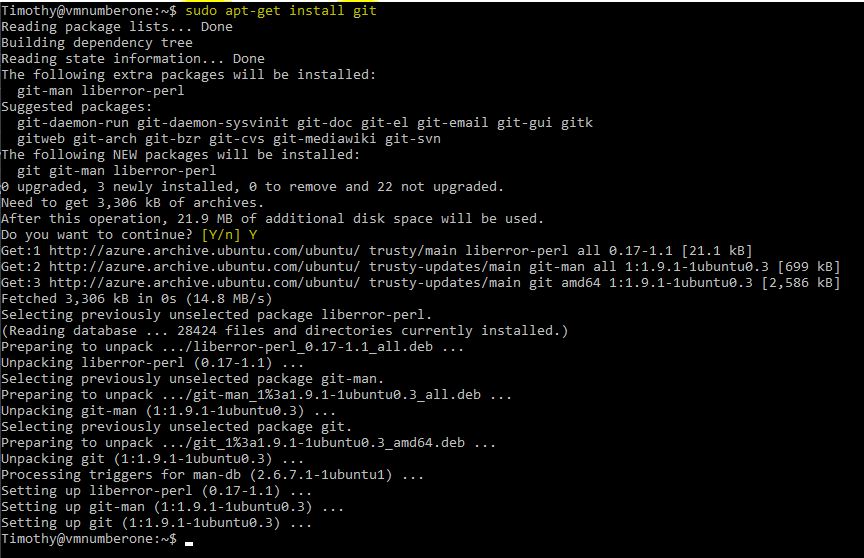
Yay! We have Git
Let’s run our update command just to double check we’re up to date:
$ sudo apt-get update 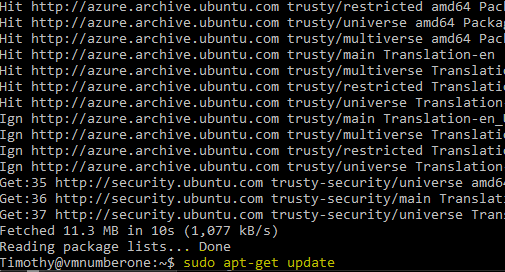
Great let’s move on with Node!
3. Install NVM and Node
First NVM: https://github.com/creationix/nvm
NVM is a version manager for Node you can install using curl: Enter this command to install it: $curl -o- https://raw.githubusercontent.com/creationix/nvm/v0.31.1/install.sh | bash
Then source your profile to add it to your commands: $ source ~/.profile
Then check out the version to make sure it installed: $ nvm --version
It should look like this: 
NVM is installed! Let’s install a version of Node! $ nvm install 5.0
Then check our version of Node: $ node -v 
Sweeeeeeet
Check out NVMs readme on the github for more commands: https://github.com/creationix/nvm
With node comes ‘npm’ which allows us to install a whole bunch of node awesomeness. One of the more popular packages is express a minimalist web framework, we’ll install this to start coding away.
4. Code and Install Express
We’ll be following along “Express’s” introduction if you get lost/have more questions about express. http://expressjs.com/en/starter/installing.html
First let’s create our a directory, cd into it and initialize our app using nom. $ mkdir myapp $ cd myapp $ npm init
After entering npm init we’ll be walked through a configuration step for our app. The only one that matters for now is (index.js) which will be the entry point for our app everything else can be the default for now.
If you were actually going to submit/share this code you’d want to accurately fill out this info.
After the initialization step we’ll add express and list it as a dependency: $ npm install express --save
Here’s what those steps look like: 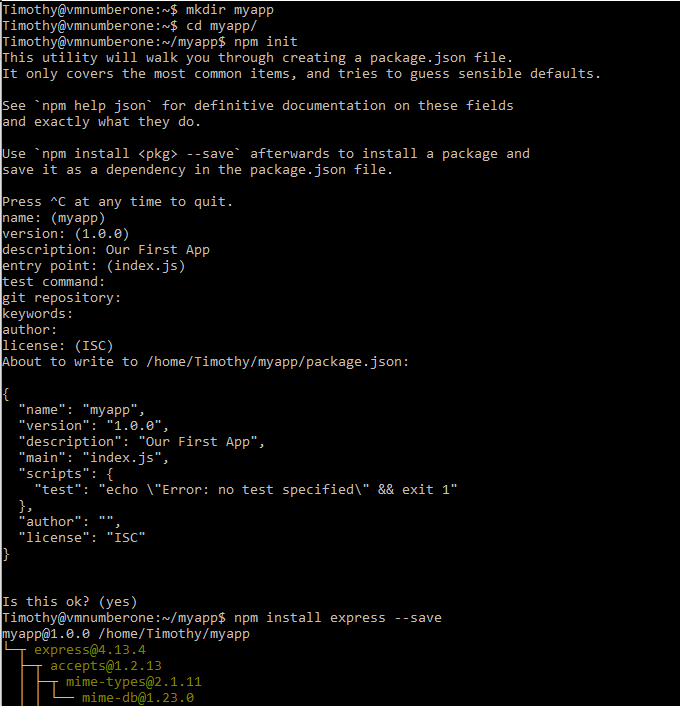
Weeee now have express and an app ready for your code!
Lets open nano and put the helloworld sample into index.js
$ sudo nano index.js
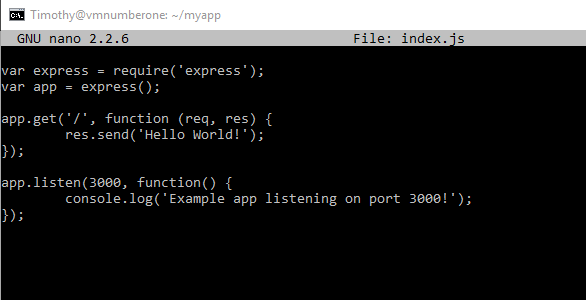
Now lets run our app! $ node index.js 
Now that its running lets visit it by entering the IP address and port number into our browser. In my case the URL is: http://13.88.180.170:3000/ 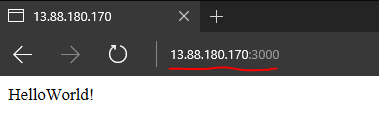
Neat!
6. Use forever to keep it alive Unfortunately, if we close our Terminal/SSH Connection our project will stop running. To solve this, we use another NPM package called forever. Here’s the link to the repository with clear instructions.
In short we install it globally: $ sudo npm install forever -g
Then start it: $ forever start app.js
And stop it: $ forever stop app.js
That’s it for now!
Now clone one of your node projects and run them in the cloud! Happy Hacking!
[caption id=”attachment_8041” align=”aligncenter” width=”4032”] When the Male Roommates are home alone…[/caption]