Starter Site for Flask On Azure Web Apps
I’ve been spending the last couple of hours learning about Flask deployments on Azure Web Apps.
There are some good resources for development setup on Visual Studio, but if you’re used to more lightweight deployment I wanted to address what is the minimum code required to get a site running locally and being able to push the changes to Azure.
That’s what this guide is all about and includes all the code required for the process.
The steps for this project will be: Create Azure Web App Clone Lightweight Code Learn What’s in the Code Deploy to Azure Make Your Changes Commit the changes Begin Workflow
Create Azure Web App Alright, let’s start by creating an Azure Web App. Web apps are a platform as a service offering from Microsoft that makes deployment and scaling easy.
Sign Up for Azure here or if you’re an entrepreneur BizSpark is a great option for $150 of free hosting.
After you get to the Azure Portal.
Select New in the lower left corner: 
Then Select Web App -> Quick Create -> And give it a name. 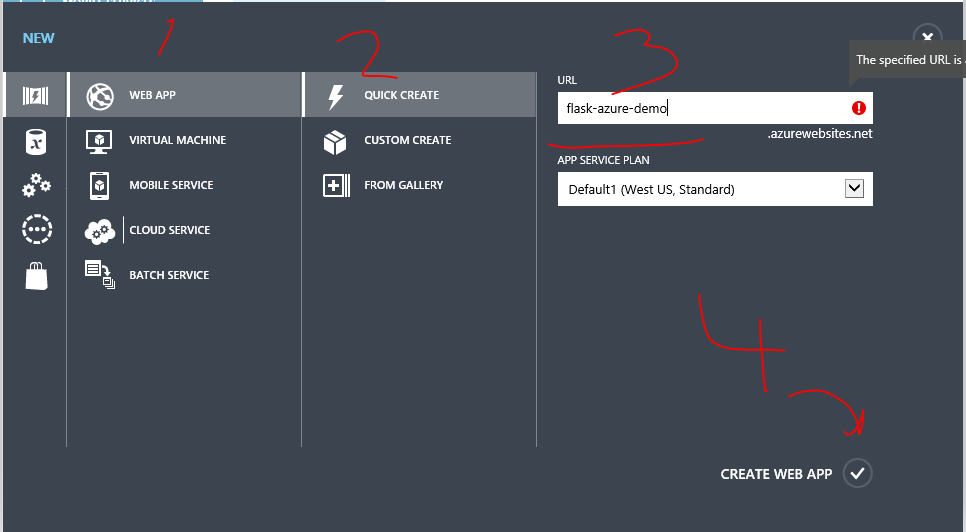 In this snip I’ve named my app flask-azure-demo. And the URL for my site is flask-azure-demo.azurewebsites.net (for now)
Cool, now that I’ve created a Web App I’ll see it listed with all my other websites: 
Double click on the listing to see the Web App dashboard:  And select ‘Set up deployment from source control’
Then select ‘Local Git Repository’ then hit the arrow in the lower left hand corner: 
After a second of refresh you should see a page with details about the Azure Repository you’ve setup. Now scroll down to the section that says “Add remote Windows Azure repository and push your stuff”
It should look like this: 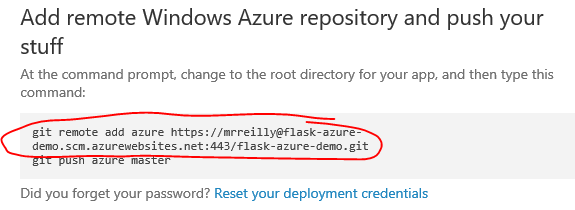
Leave this tab open and/or copy these commands. We’ll use this later, in the section titled ‘Deploy to Azure’
1. git remote add azure https://you@yoursite.scm.azurewebsites.net:443/yoursite.git 2. git push azure master
Great! We have a Web App with an empty repository ready for our Flask Code!
Clone Lightweight Code
I have created a repository with all the code Azure requires to host flask and a bare-bone site as a proof of concept. (If you’re not familiar with how to Git my friend Tobiah has a great guide.)
You can clone the repository or you can fork then clone. It’s totally up to you. Later in this guide I’ll show you how to remove ‘my remote origin’ if you choose to clone now. If you’re familiar with GitHub I would recommend forking then cloning and if you’re not super comfortable with git here’s what you do:
Navigate to my the repository on GitHub: https://github.com/timmyreilly/babypython-azure 
Copy the link at the top of the page or this: https://github.com/timmyreilly/babypython-azure
Create a directory that the code will live in: 
cd into that directory using your Git Shell and run this command: git clone https://github.com/timmyreilly/babypython-azure.git
This is what it looks like on my machine: 
Great, now we have the code and we can cd into the repository and take a look at what’s in there:
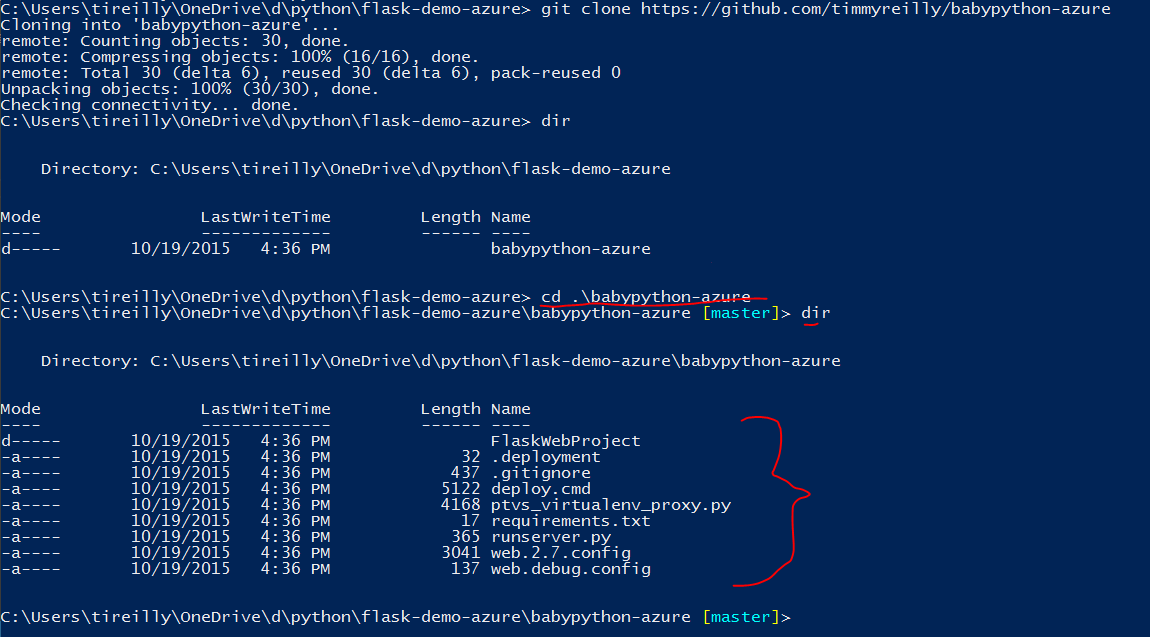
Looks good, but what is all that stuff?
Learn What’s in the Code
Open the newly cloned repository into your favorite text editor.
This is what it looks like in Visual Studio Code: 
There are a bunch of files in there and very few of them have to do with Flask, so what do they do?
.deployment - tells azure which deployment command to run and can be customized to include various configurations
.gitignore - this lists all the files/file types that git should ignore during commits. This keeps code that’s private out of public repositories. The one in the repo you clones should cover all your bases for now, but if you add a service tokens/api key make sure the file you add is included in your .gitignore
deploy.cmd - this is the default deployment command for Azure web apps. You’ll see it contains ‘if’ blocks to determine what type of code you’re running whether it be Node, Python, or something .NET. As you get more complicated flask apps you may need to edit this, but for this tutorial you can leave it alone.
ptvs_virtualenv_proxy.py - is a script used to retrieve the WSGI handler, activate the virtual environment and log errors. It is designed to be generic and used without modifications. - Thanks Azure Documentation.
requirements.txt - includes the list of all python packages your project requires. Azure git deployment will automatically create a virtual environment and install all the packages listed in your requirements.txt
runserver.py - is a generic flask runserver command that will work with azure, if you have an app of a different name you’ll need to change the from FlaskWebProject import app accordingly.
web.2.7.config & web.debug.config - are the two important files for Web App deployment. They are used to specify how the server handles requests. Because our config file is titled web.2.7.config azure will automatically copy the appropriate file as web.config.
If you’re still curious/plan to deploy any type of production code I would recommend reading ‘Configuring Python with Azure App Service Web Apps.’
The only thing left is our app, which you’ll find under FlaskWebProject!
Let’s get it deployed!
Deploy to Azure
Remember when wrote down these commands: 1. git remote add azure https://you@yoursite.scm.azurewebsites.net:443/yoursite.git 2. git push azure master
Now we get to use them. Copy the stuff from your web apps deployment page if you left open the tab.
And run the commands as so: 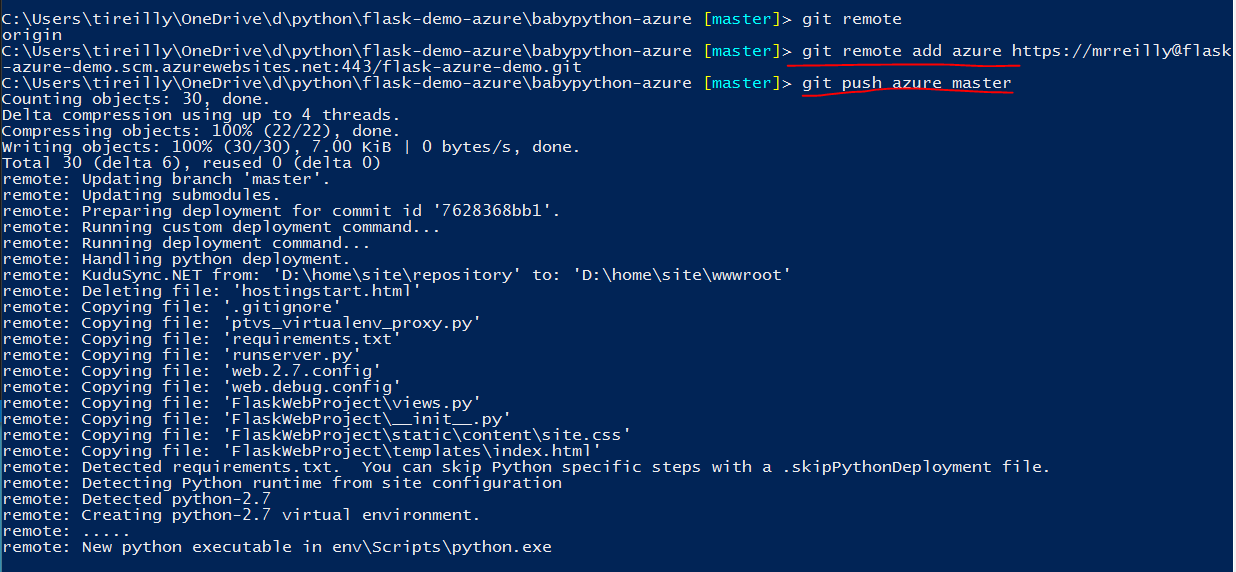
After you run that final command git push azure master you’ll see a log of what’s happening in the Azure Web App instance.
You can check the progress back in the browser under deployments. It should look something like this: 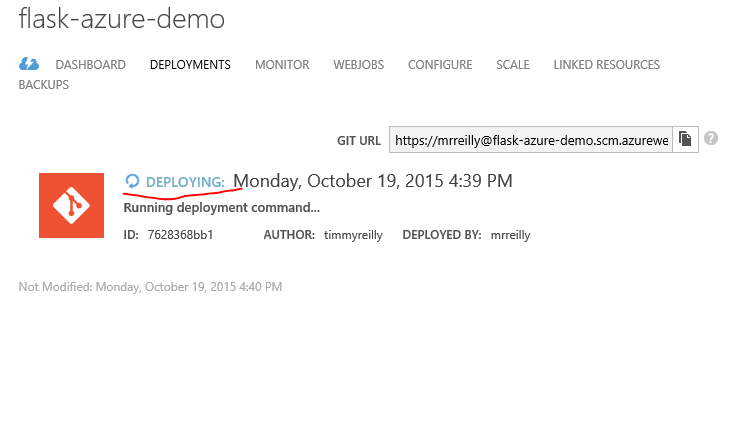
Also when the logging finishes in the git shell you’ll see something like this: 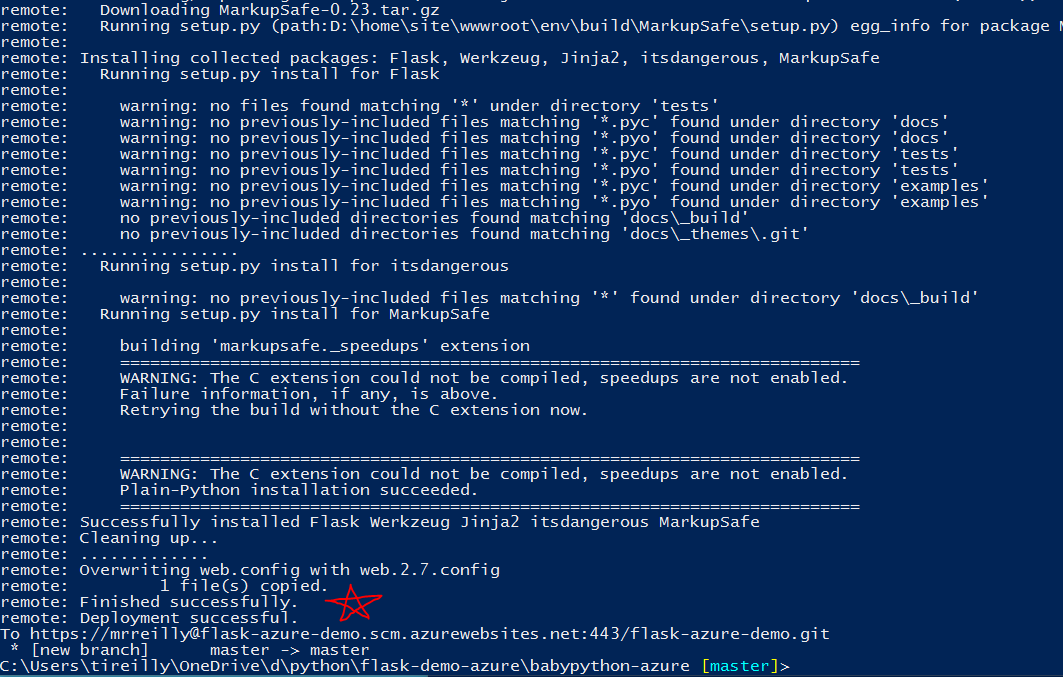 You shouldn’t see a red star, but I put that in there because you’re awesome at following directions.
Because deployment was successful, you’ll be able to visit your brand new web site!
Check it out by going to 'yoursite.azurewebsites.net' in this case: flask-azure-demo.azurewebsites.net
Looks good! 
But not really that unique. Let’s make it yours.
Make Your Changes
Before we make any changes, lets run our project locally so we don’t have to wait for deployment every time we make a change.
To do that simply use a virtual environment with Flask installed and run python runserver.py. If you’re confused about this check out this guide I wrote a ways back about using Flask on Windows
Run this command to run the project locally: python runserver.py
It should look like this: 
And we can navigate to [http://localhost:5555/](http://localhost:5555/) to see our project.
And you’ll see it looks exactly the same as our hosted project on azure: 
Now let’s make a quick change: Open views.py in your text editor. Add a new view and a new HTML page to navigate to. In this case it’s named awesome and includes some other text.
You can find all the code here: https://github.com/timmyreilly/flask-azure-awesome
Then restart your server and view the new page.
The whole process should look like this: 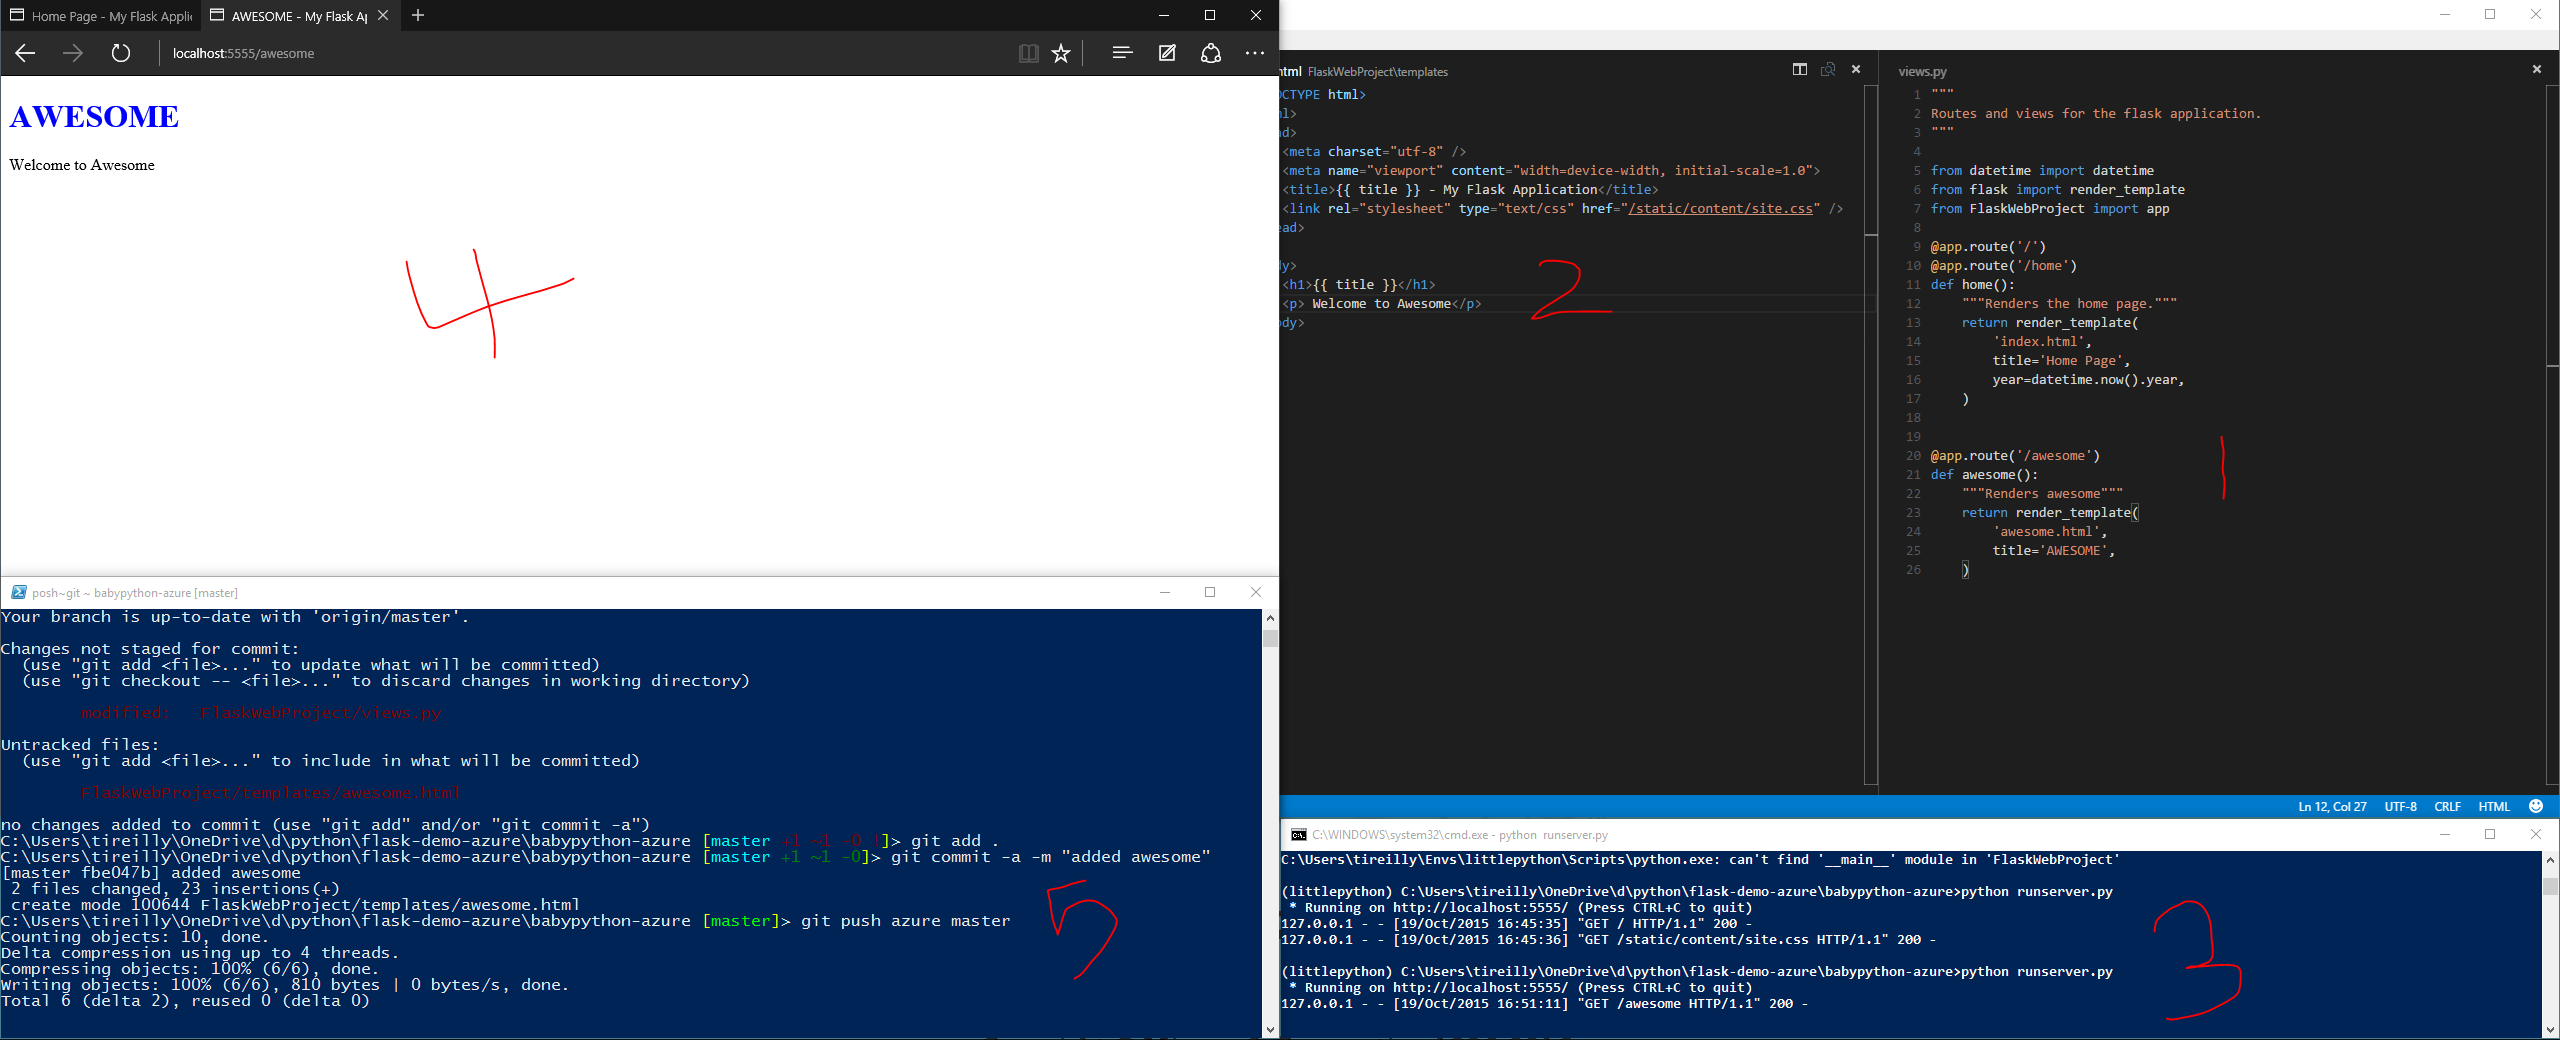
Great, now that we have a change let’s commit it and push it to Azure!
Commit the changes
Use git to commit your changes. git add . git commit -a -m "made our first change"
You’ll notice our [master] tag went from red to green, but we want it to be blue and at the same commit as our remote repos.
Second let’s remove my repository as one of your remote repository, so you can add your own origin later.
Check which remote repositories you currently have: git remote
You should see azure and origin listed.
Enter git remote rm origin to remove my repo from your remote repositories.
Now when you enter git remote you’ll only see azure.
Those steps should look like this: 
Great, now we can run: git push azure master
This will show the azure logging and will deploy our changes to our web app.
Now when we navigate to ‘yoursite.azurewebsites.net/awesome’ you’ll see the new page you created!
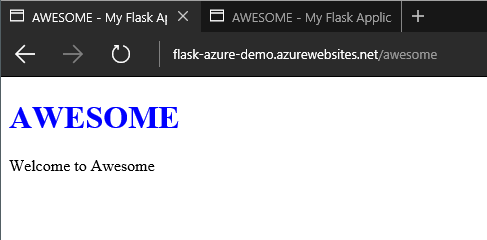
Great!
Let’s wrap this up by getting your changes into your own GitHub repo and establishing a solid workflow.
Begin Workflow
First go into GitHub login and create a new repository, give it a representative name and do not initialize with a readme.
Then hit create repository.
Should look like this: 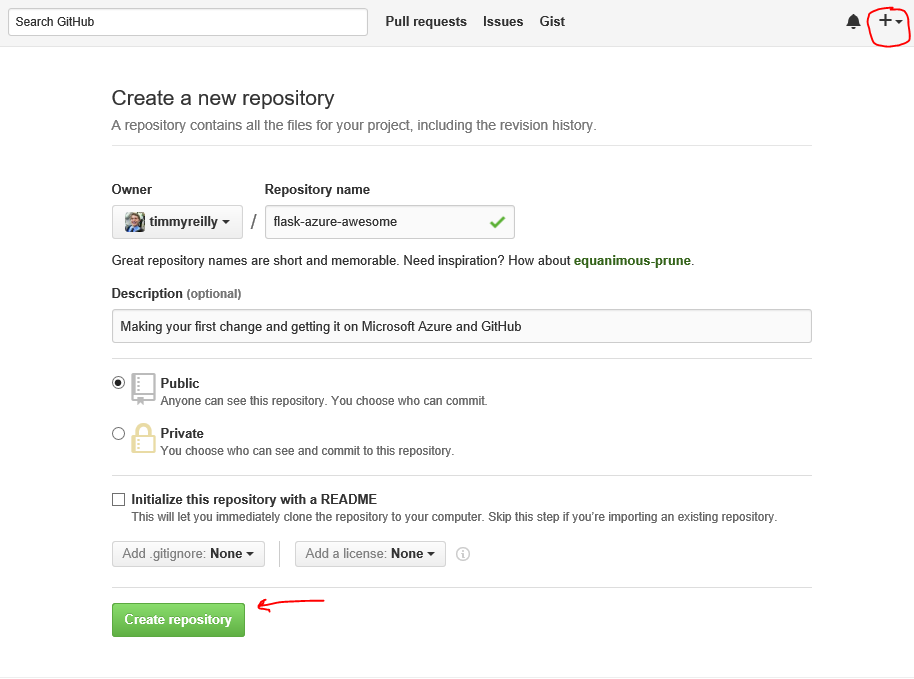
Great now you’ll see this page with repository details. We’ll add this repository as your origin repo just like we added azure as an ‘remote azure’ repo.
Copy these commands: 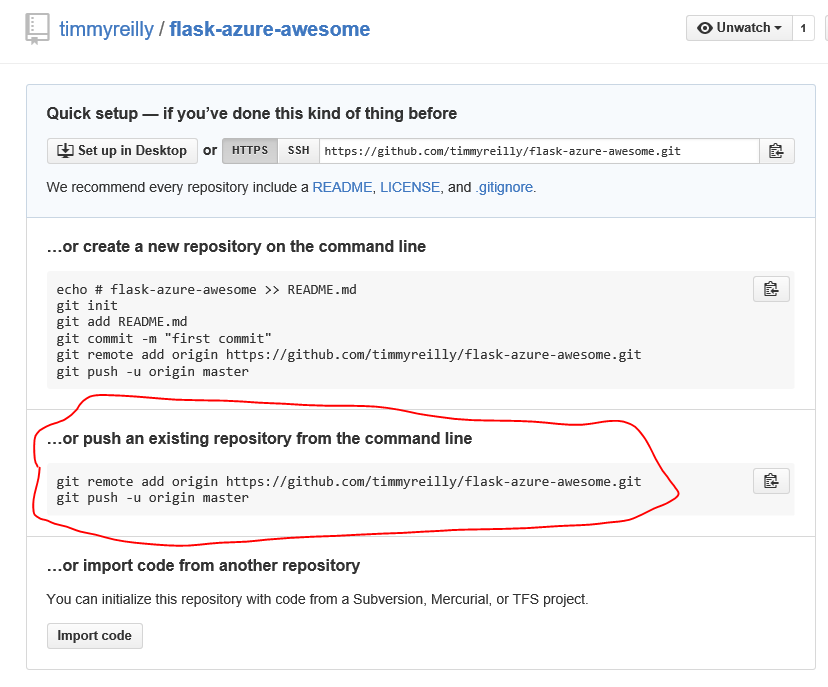
And run them in your Git Shell like so: 
Now when refresh our repo on GitHub we’ll see our code! 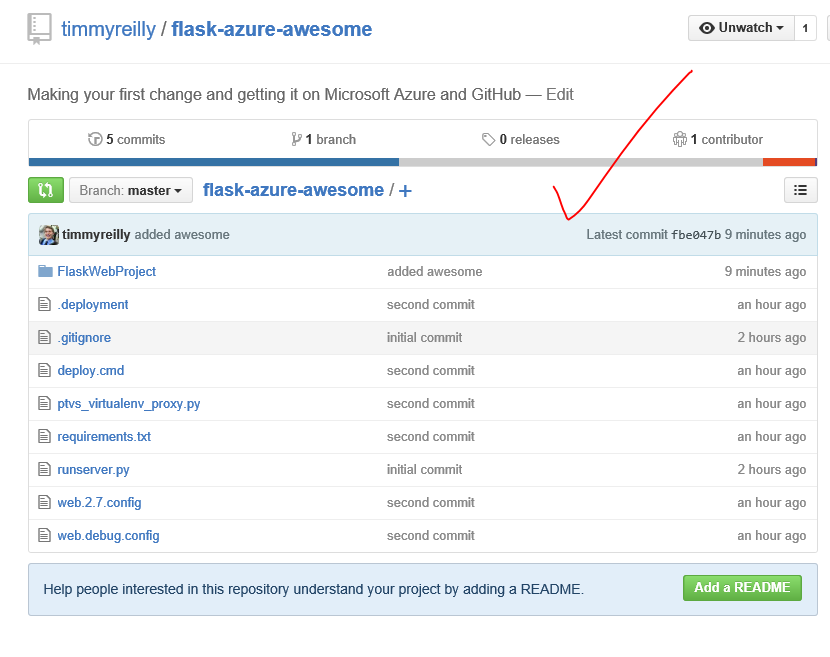
Sweet this is all yours now!
Now whenever we make a change to our code we can commit it to two locations this is my current workflow and provides the convenience of git deployment and GitHub redundancy.
This is what it looks like in my shell: 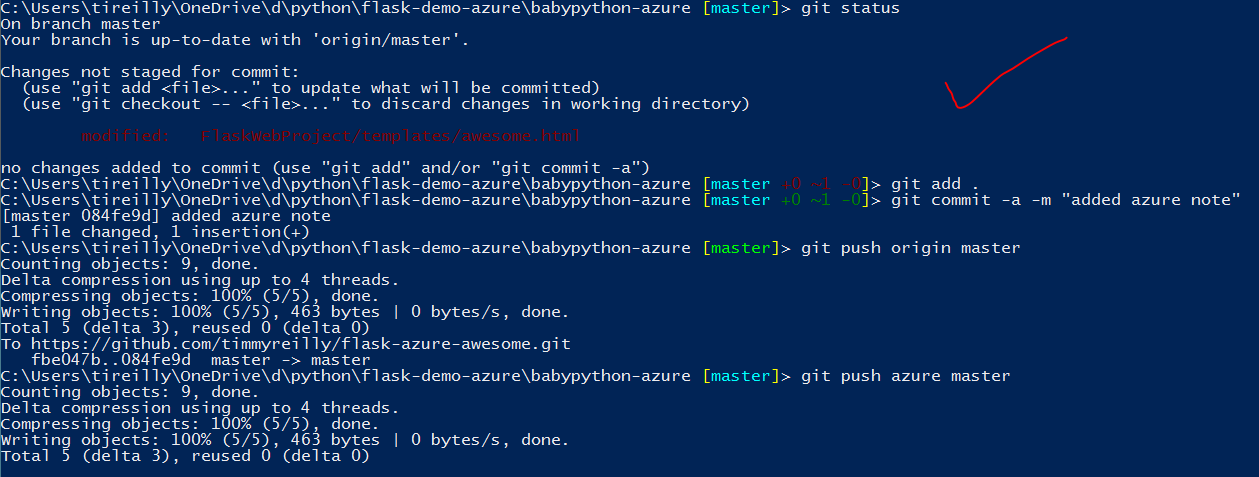
And on Azure and GitHub we can see the changes: 
That about wraps it up.
Hope this helps you get started developing flask for Azure. Please let me know if you have any questions or comments. Tim.Reilly@microsoft.com @timmyreilly
[caption id=”attachment_6101” align=”aligncenter” width=”3264”] Recycling Can Man! Kinda like Trash Can Man.[/caption]