Kinect Kannon
How to setup KinectKannon
More info about the Kannon can be found on Steven’s GitHub & Blog Software Setup: Get a computer setup with decent specs and usb 3.0 (X1/SP3) with Visual Studio Install the Kinect 2.0 SDK Install Phidgets drivers Clone the repository from github Open the .sln file in visual studio
Hardware Setup: Make sure the surge protector is connected to an outlet and illuminated
Check all outlets in the surge protector
Connect the white ‘normal’ sized usbs to the hub.
And connect the single hub to a usb 2.0 on your computer
Make sure the Hub is powered with the small dc power adapter
Connect the Kinect USB 3.0 to your usb 3.0 port. The Kinect has the more dense cord and the blue usb tip.
Locate the Xbox controller and make sure you have adequate battery power
Locate your co2 bottle. This is a bit tricky.
The hose coming from the cannon portion needs to be attached to the bottle
First take dial on curly hose and rotate all the way to the left (lefty loosy) You’re moving the pin away from the pin so you can connect to the bottle without freezing your hand
Now righty tighty the bottle onto the curly hose. Make it snug.
You can now righty tighty the dial from the hose to the tank. You should feel the hose take on the pressure
If you hear/feel leaking, lefty loosy the dial on the hose connector and retighten the bottle to the hose.
Leaks are not your friend
Loading the kannon
T shirts folded once and then rolled tightly and wrapped with rubber bands work well. The tighter the fit the farther the launch. So if you’d like to launch further you may want to fold the shirt in thirds!
Now you are ready to run your code!
Start the program using our favorite green arrow
All is good if app says system ready in the top right corner
Power on your Xbox controller
This will be how you interface with the Kannon
There are three aiming modes which can be selected using the X, A, and B buttons
Manual (x button): Full (x, y) axis control using the left stick Keep the kannon facing forward. Turning too far can break connections and render the Kanno
Tracking (A button): The Kannon will detect people using the skeleton tracking and attempt to move the crosshairs to the center of the body.
WARNING the tracking feature may throw in an exception which will result in the Kannon losing control and reeling to the right. This puts it at risk of breaking connections and rendering the device useless.
To mitigate the risk Be near the kannon you may have to physically stop it from turning Once you stop it from moving, it will continue to resist, Stop and Start the Visual Studio Project. It will enter back into manual mode and you can move it back to center Keep the controller in hand ready to switch to manual mode if the device begins to move hard right
Also, in tracking mode. If you have several people lined up in front of the Kannon you can switch between targets using the D-Pad on the controller. This is a bit buggy as the skeletal tracking hops in and out your selections may not register. Moving back to manual mode will reset the selection capabilities. Now go back to tracking and try using the D-pad again.
Audio (B button): Audio mode will use the array of microphones to detect the direction of sound and move the kannon towards the loudest noise. Commanding it like a dog works pretty well, or if you can get someone to laugh. “Come here kannon!, Good boy!” You are still in manual control of the Y axis. It will pan left and right, but you can aim up and down.
Other Features
Night vision To enable night vision in any mode simply press the y button, and press y to turn it off
Audio The program uses a text to speech library to speak current state if you can plug your computer into speakers during a demo it can have a great effect!
Safety and Firing In all aiming modes the kannon is capable of firing. To toggle safety hit the RB and LB buttons simultaneously You’ll see firing enabled come through on the display Once the safety is off pull both triggers (LT and RT) to fire Just like a real gun. Turn on your safety once fired
Troubleshooting: If phidgets driver offline Check your phidgets control panel (Search Phidgets Control Panel) If the there are two devices connected We have a USB issue check this forum for more info: Basically, you have to find the program that is using the USB and close it. Or move to another more stable computer and load the program there If the devices do not show up in the control panel Check your connections The phidgets controllers are connected using the white USBs One leads to the valve switch controller on the back That’s the relay panel mounted on the back of the box, the USB has a tendency to fall out so double check One leads to the servo controller (The black box with the foam handle) Check that controller is turned on, the switch can sometimes be accidently knocked off. You should be able to see a small red light from the box. Also check the fuse.
Hope this helps get you started! Let me know if you have any questions in the comments below.
I’ll be posting edits as I find ways to clarify.
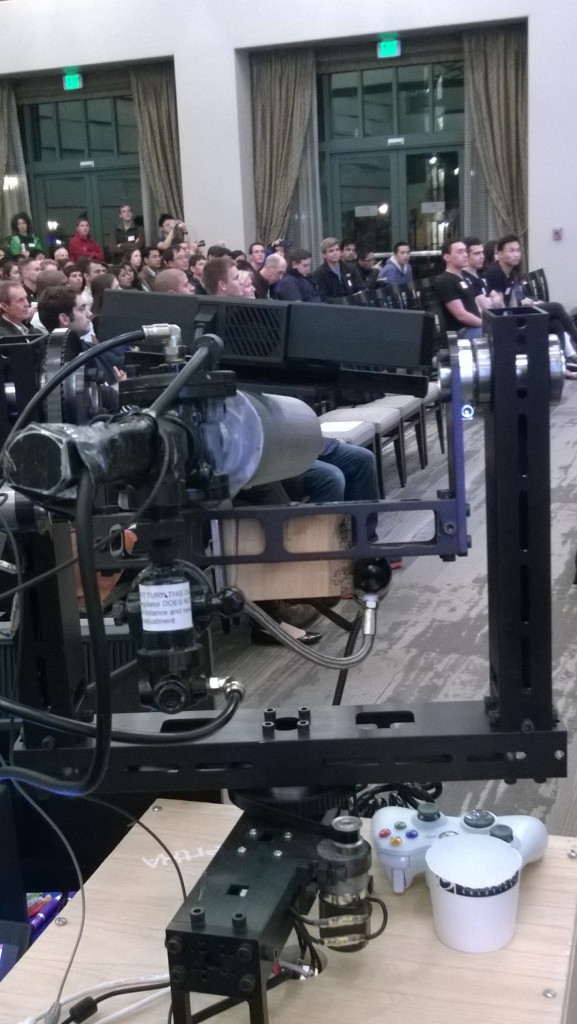
[caption id=”attachment_3121” align=”aligncenter” width=”577”] Here’s the Kannon hanging at Stanford[/caption]