Pin Putty.exe to Start Menu In Windows 10
When working with the cloud a any remote device being able to quickly SSH into a box is important for maintaining focus.
So, I was pleased to find a way to keep putty two clicks away by placing it in the start menu.
Here are the steps I took to keep putty handy. And an alternate way below if you’re familiar with downloading .exe’s.
1. Download putty.exe [caption id=”attachment_2861” align=”aligncenter” width=”660”] Notice save and the small black arrow next to it?[/caption] 2. Save it to your download files 3. Go to downloads folder [caption id=”attachment_2881” align=”aligncenter” width=”660”]
 Now you can navigate to the downloads folder from the downloads bar [/caption] 4. Right click and select pin to start menu 5. Then right-click -> cut putty.exe from your downloads file and move it someplace more permanent like you’re program files. 6. Go find putty in your start menu!
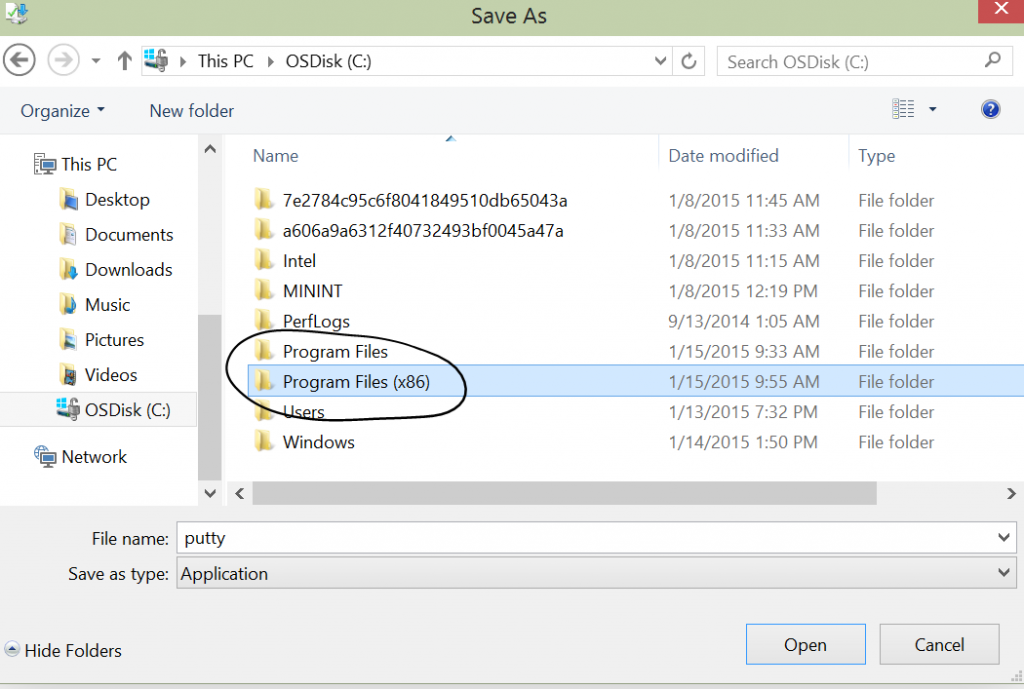
Alternatively you can also save putty directly to your program files. 1. Download putty.exe 2. When the download bar appears select “save as” under the black arrow next to save. [caption id=”attachment_2861” align=”aligncenter” width=”660”] Use the small black arrow in the circle to find “save as”[/caption] 3. Navigate to your program files. [caption id=”attachment_2921” align=”aligncenter” width=”660”]
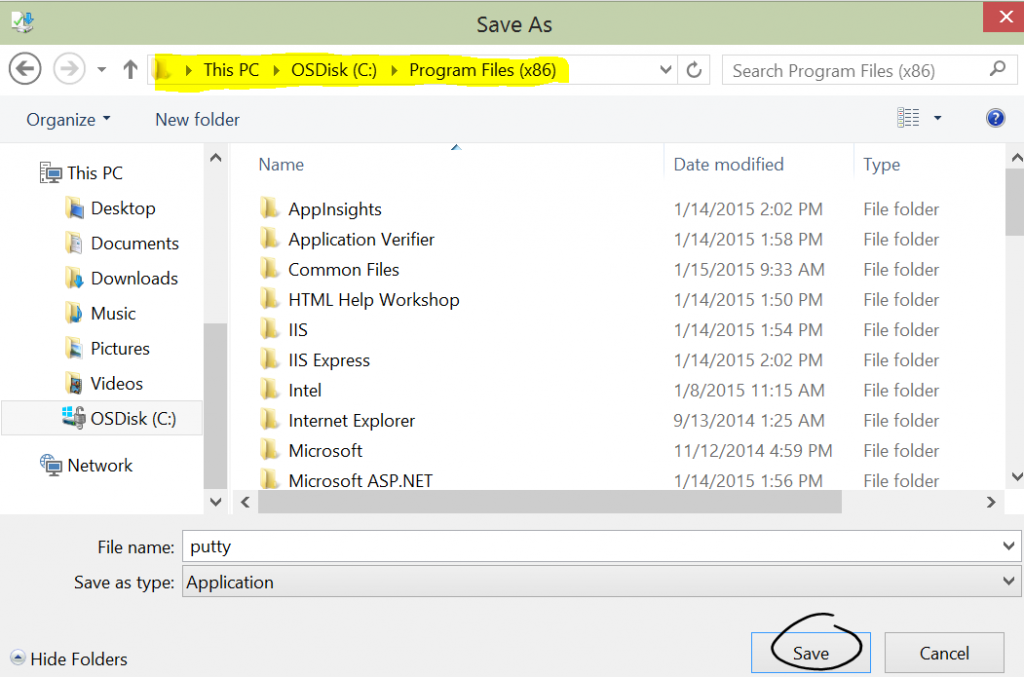
 This is the folder I have chosen for putty[/caption] 4. Select save. [caption id=”attachment_2941” align=”aligncenter” width=”660”]
 Here is the save button. Notice the file path. You need to navigate here to find putty in the next step. [/caption] 5. Open file explorer to the file you saved putty in 6. Right click on putty and select pin to start. 7. Go find putty in your start menu.
You can resize and move the putty icon to your hearts content and never go searching for your SSH client again!
[caption id=”attachment_2981” align=”aligncenter” width=”660”] After Frisbee Chow Town[/caption]